Apple Stack Cake
Cake
1 3/4 c all-purpose flour
1/4 tsp baking powder
pinch of salt
1/2 tsp cinnamon
1/4 tsp allspice
1/4 tsp nutmeg
3/4 stick unsalted butter, softened
1/2 c dark brown sugar
1 egg, beaten
1/3 c buttermilk
1/6 c molasses or molasses substitute (recipe to follow)
1/2 tsp vanilla extract
Apple Filling
1/2 tbsp unsalted butter
5 apples, thinly sliced (assorted colors)
1/2 cup apple juice
3 tbsp sugar
1/2 tsp cornstarch
Apple Glaze
1 c apple cider
1/3 c sugar
3/4 tsp cornstarch
1/4 tsp ground cinnamon
Molasses Substitute
1/4 c brown sugar
1/4 c sugar
1/3 corn syrup
Directions
Cake
1. Preheat the oven to 350*F.
2. Butter and flour three cake pans, if you don't have 3, you can bake them in batches
3. Mix together flour, baking powder, salt, cinnamon, allspice, and nutmeg, and set aside.
4. In a separate bowls, cream together butter and sugar.
5. Add the eggs, milk, vanilla, and molasses or molasses substitute; blend until combine.
Note: If you are using a molasses substitute then plan on making is ahead of time to allow the sugars to break down a little, at least five minutes. Mix together the sugars and corn syrup and stir until blended well.
6. Gradually add in dry ingredients and stir until blended.
7. Split the batter equally between pans using a small measuring cup, I use a 1/3 c measuring cup. This way they bake evenly and have the same cooking time.
8. Gently with a rubber spatula pull the batter to the edge of the pan, be care to not pull up the flour. The batter is thick so just take your time pulling the batter all the way to the edges; the batter doesn't really spread out so you want it touching the edges.
9. Bake for 12 to 14 minutes, the dough is thick and pretty thin so it doesn't take nearly as long as a traditional cake.
10. Let cool in pan for about 5 minutes before transferring to a cooling rack to cool.
Note: That the cake layers can be made a day in advances, wrapped tightly in a few layers of plastic wrap and refrigerated.
Apple Filling
1.Meanwhile, to prepare the apple filling, slice apples between the thickness of a nickel or quarter.
2. Then melt butter in a large skillet or pot over medium heat.
3. Add in apples and cook for 2 minutes, stirring occasionally
4. Add in the apple juice, corn starch, and sugar. I'd suggest adding half the juice, then the sugar and corn starch, then add the rest of the juice over it, so that the juice helps the corn starch and sugar start to dissolve.
5. Cover and cook for about 5 minutes or until the apples are softened.
6. Drain off the liquid and set the apples aside in a bowl to cool down.
Apple Glaze
1. Combine the apple cidar, sugar, cornstarch, and cinnamon in a medium sauce pan over heat heat.
2. Bring to a boil.
3. Then reduce the heat to a simmer and stir occasionally for about 8 minutes.
4 Remove from heat to allow to cool and thicken a little more.
Assembly
1. Place one cake on a large plate or plater.
2. Then spread a few generous spoon fulls of the glaze over the cake. It may look like a lot but remember that some will soak into the cake and some will congeal somewhat with the apples.
3. Then lay out half the cooked apples fanning them out in layers so that the peel edge sticks out the edge of the cake then fill in the middle.
4. Add a spoon full or so of the apple glaze on top of the apples.
5. Then add on the next layer of cake and repeat the method with the glaze and apples.
6. Finally, top it off with the last layer of cake and dust with powder sugar.
The story behind this cake, is that it was tradition throughout the Appalachian Mountains to make this cake as a wedding cake. Most people could not afford a cake from a bakery so everyone related to the couple would chip in what flour, sugar, and spices they had. Then they would make a cake very similar to this one, and depending on the size of the family, that would affect how many layers the cake would turn out to be, because they would have more donated ingredients if there was a large family.
I got a basic recipe and back story about Apple Stack Cakes from "A World of Cake" by Krystina Castella. You will see more cakes from this book throughout the year, as I plan to make every cake at least once. The Queen Mother Cake was a variation I made to her Queen Mother Cake from England.
Here are all the ingredients you need: all-purpose flour, baking powder, salt, cinnamon, allspice, nutmeg, unsalted butter, dark brown sugar, egg, buttermilk, molasses or molasses substitute, vanilla extract, 5 apples, apple juice, sugar, cornstarch, apple cider, cornstarch, and corn syrup if you don't have molasses.
Cake
Preheat your oven to 350*F. Then spray your cake pans with non-stick spray or lightly butter them with a stick of butter, I used 8 inch pans. Then put about a spoon full of flour into the first pan.
Gently turn the pan until the entire bottom is coated in flour, then over the sink or trash can, because you will loose some, turn the pan tapping it when needed to coat the sides. I only have two pans so I had to reuse one for the last layer after baking the first two layers.
Note: If you are using a molasses substitute then plan on making is ahead of time to allow the sugars to break down a little, at least five minutes. Mix together the sugars and corn syrup and stir until blended well.
The mixture will be very thick, sticky, and gritty. Set it aside after mixing well.
You will then need to sift the flour. You can get a sifter that is hand cranked or like this one the handle is a trigger, but personally the fancy sifter is much more work sitting there pulling the trigger 50 times before all the flour is sifted. I prefer using this wire mesh strainer and rubbing the flour through with the back of a spoon.
Mix together flour, baking powder, salt, cinnamon, allspice, and nutmeg, and set aside.
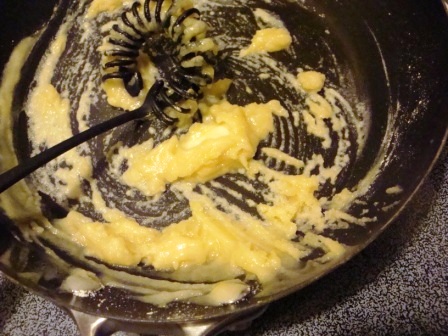
In a separate bowls, cream together butter and sugar.
Butter and sugar creamed together, should me completely blended and fluffy.
Beat the egg in a small bowl, this is just to break up the yolk. I like to use a fork.
Add the eggs, milk, vanilla, and molasses or molasses substitute; blend until combine.
After all the wet ingredients have been mix, it doesn't look very appetizing, I will admit that I was nervous that it would not turn out, because of the amount of liquid the butter was broken up in little bits but if the happens with yours the flour will aid in blending it together.
Gradually add in dry ingredients and stir until blended. Make sure to scrap down the sides with rubber spatula about half way through blending and make sure there aren't any flour pockets at the bottom of your bowl.
Split the batter equally between pans using a small measuring cup, I use a 1/3 c measuring cup. This way they bake evenly and have the same cooking time.
Gently with a rubber spatula pull the batter to the edge of the pan, be care to not pull up the flour. The batter is thick so just take your time pulling the batter all the way to the edges; the batter doesn't really spread out so you want it touching the edges. Bake for 12 to 14 minutes, the dough is thick and pretty thin so it doesn't take nearly as long as a traditional cake.
Remove from the oven and allow them to cool in pan on a wire cooling rack for about 5 minutes.
Then run a knife around the edge of each pan before turning them out on the cooling rack. I prefer to flip them back right side up after getting them out of the pan.
Note: You can tell with the layer on the right that I didn't quite get the batter to the edge before baking it so now it's not perfectly round.
Because I only have two pans, after turning out the first two layers I then had to wash and re-flour one of the pans to bake the third layer.
Note: That the cake layers can be made a day in advances, wrapped tightly in a few layers of plastic wrap and refrigerated.
Apple Filling
You will want an assortment of different colors apple, they do not all have to be baking apples. Meanwhile, to prepare the apple filling, slice apples between the thickness of a nickel or quarter.
Note: I do have 6 apples here but only used 5, I though 6 looked prettier for the picture.
Then melt butter in a large skillet or pot over medium heat. I wish I had a large cast iron skillet but I don't and had to use a pot because oll of out skillets are too small
Add in apples and cook for 2 minutes, stirring occasionally
Add in the apple juice, corn starch, and sugar. I'd suggest adding half the juice, then the sugar and corn starch, then add the rest of the juice over it, so that the juice helps the corn starch and sugar start to dissolve. Cover and cook for about 5 minutes or until the apples are softened. Drain off the liquid and set the apples aside in a bowl to cool down.
Apple Glaze
Combine sugar, cornstarch, and cinnamon in a medium sauce pan over heat heat.
Add in apple cider and bring to a boil. Then reduce the heat to a simmer and stir occasionally for about 8 minutes. Remove from heat to allow to cool and thicken a little more.
Assembly
Level off any areas that stick up to make the cake level with a serrated knife. Place one cake on a large plate or plater.
Then spread a few generous spoon fulls of the glaze over the cake. It may look like a lot but remember that some will soak into the cake and some will congeal somewhat with the apples. Then lay out half the cooked apples fanning them out in layers so that the peel edge sticks out the edge of the cake then fill in the middle. Add a spoon full or so of the apple glaze on top of the apples.
Then add on the next layer of cake and repeat the method with the glaze and apples. Finally, top it off with the last layer of cake and dust with powder sugar.
Enjoy!